|
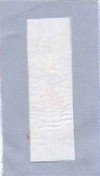
The Frayed Edge finish is used to add a 1/2" frayed border around your finished project. The cross stitch fabric is stiffened by sandwiching multiple pieces of fusible web, available at most fabric stores, between another piece of fabric identical to that used to stitch the project. The two pieces of fabric are then sewn together to ensure that the frayed edges will not unravel beyond that point. Materials Required
|
|
Construction
1.
Determine the size of the area of your pattern that you wish to remain unafrayed. To do this, add 1/2" to 1" (1.3 to 2.5 cm) to the width and height of your pattern to server as a border. See Using the Fabric Size Calculator for details on how to quickly perform this calculation.
2.
Cut at least three pieces of fusible web to the size determined in step one. To make the finished project stiffer and thicker, you can cut additional pieces of fusible web.
3.
Center the fusible web pieces on the BACK of your finished stitching and secure according to manufacturer's directions.
4.
Place the two pieces of fabric back-to-back with the finished sides facing together. You should be able to see the outline of the fusible web through the fabric.

5.
Use clear tape to create a stitching guide. The tape should be placed about 1/8" (32 mm) beyond the fusible web. It is critical that the fusible web remain on the inside of the stitching otherwise it will interfere with the fraying process. The tape should cover your work as you will be stitching on the outer edge of the tape.

6.
Pin the two pieces of fabric together. In order to ensure that the fabric frays evenly on all edges, it is critical that the "rows" and "columns" in the top piece of fabric match up exactly with those in the bottom piece. For example, if you place a pin through the top piece of fabric 6 squares in from the edge, make sure that the pin goes through the same square on the bottom pieces.
7.
Stitch all the way around the outer edge of the tape. If possible, try to keep your stitches along the same line in the fabric so that the edges will fray evenly. If you stitch across three separate "columns", for example, your frays will come out uneven.
8.
Carefully remove the tape and pins. Starting with the top layer of the fabric beginning on the top edge, pull out the fabric threads going horizontally. Stop as soon as you reach the stitches. Repeat with the bottom layer of fabric. The right and left edges are frayed in a similar manner by removing the fabric thread going vertically.


Back