
This finishing technique can be used to turn small patterns stitched on perforated paper into jewelry pins. The basic process involves securing a Bar Pin to the back of the finished stitching and then covering with felt.
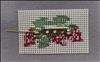
 Trim your completed stitching to within 1/2" (1.3 cm) of the edge of the stitches. There's no need to follow the exact outline of the stitches at this time.
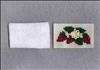
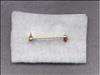
 Fold the felt in half horizontally (fold the top to the bottom). Place the Bar Pin lengthwise next to the fold and mark the location of both ends with a pen.
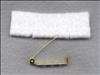
 Center the Bar Pin lengthwise on the back of your stitched piece and mark the location with a pen. Using a small amount of hot glue, glue the pin to the back of the stitched project aligning to the marks just made.
 Unclasp the Bar Pin and put the pin through the one hole and slide down till it covers the stitching. The other hole in the felt should be placed over the clasp-side of the pin. Once you have the felt properly aligned over the pin, apply a small amount of white glue to the back of the stitching and press the felt down until the glue has set. Let dry a few hours.
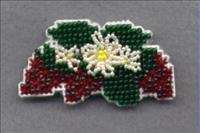
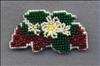 Using a small pair of scissors, trim the excess perforated paper as close as possible to your stitches. You want to avoid cutting a hole in half that contains stitches. Alternately, you can trim to any other shape that works for the pattern like a square, circle, or oval.