
This finishing technique uses 1/4" Flex Foam to give the stitched piece a raised, pillow-like look. The addition of a braided cording hanger and trim completes the Christmas ornament finish.
 Decide on the size of your finished ornament and then trim your completed stitching 1/2" (2.5 cm) larger on all sides. For example, if you want the completed piece to be 2" x 2" (5cm x 5cm), trim your fabric to 3" x 3" (7.6cm x 7.6cm).
 Cut a piece of 1/16" (1.6mm) thick solid cardboard the size you want for the finished ornament determined in Step 1.
 Cut a piece of 1/4" (1.6mm) thick Flex Foam the same size as the solid cardboard cut in Step 2.
 Use hot glue to affix the Flex Foam to the cardboard backing.
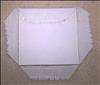
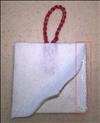
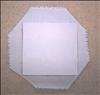 Center the cardboard and foam piece one to the back of your stitching with the foam-side down. It is critical that the cardboard is centered evenly. Trim the corners from all four sides as shown in the image. Leave one cross stitch square space between the corner and your cuts.
 Ensure that the foam is face down and centered on the back of your piece. Put a bead of hot glue along the top edge of the cardboard and fold over the top of the fabric onto the hot glue pulling slightly. Be careful to not burn your fingers. Repeat with the bottom edge. Turn over before proceeding to ensure that the alignment is correct and adjust as necessary.
 Turn over and glue the sides in the same manner as done in Step 6. To secure the corner, put a small dab of hot glue at each corner and fold over the small amount of remaining fabric.
Shape as necessary while the glue is still warm.
Turn over and glue the sides in the same manner as done in Step 6. To secure the corner, put a small dab of hot glue at each corner and fold over the small amount of remaining fabric.
Shape as necessary while the glue is still warm.
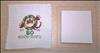
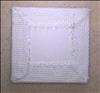
 Cut a piece of felt to cover the back of the ornament.
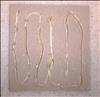
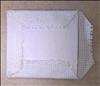
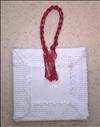 Cut a 5" (12.7cm) piece of braided cording using hot glue to seal the ends. Loop in half and glue to the back of the project at the center of the top as shown in the picture.
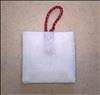
 Take the felt cut in Step 8 and use hot glue to attach to the back of the project one side at a time.
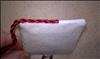 Measure a piece of braided cording that is long enough to go around the entire edge of the project sealing the ends neatly with hot glue. Starting at the middle of the bottom, use hot glue to attach the braiding to the edge covering the space between the felt and the fabric. Only glue short lengths so the hot glue does not harden before the cording has been pushed into the glue. When you reach the end, neatly glue the two end together.
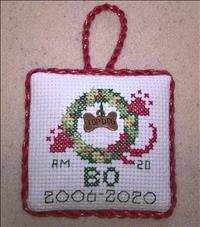
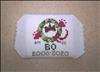
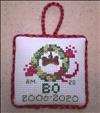 The finished ornament is complete and can be hung using the hanger added to the top.