
This is a relatively quick and easy finishing technique to turn your small cross stitch projects into Christmas ornaments using pinking shears to create a decorative edge.

 Trim your completed stitching to within 1/2" (1.3 cm) of the edge of the stitches using pinking shears.
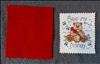 Using pinking shears, cut a piece of felt 1" (2.6 cm) larger than your trimmed project. This measure will result in a 1/2" (1.3 cm) border once your project is mounted. Choose a felt color that complement the color of your stitched project.
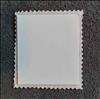 Cut a piece of solid cardboard slightly smaller than your trimmed project. The cardboard should not show when placed on the back of your project. Use a small amount of white glue to affix the cardboard to the back of your project.
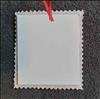 Cut a 6" (15 cm) length of ribbon. On the back of your project, use a small amount of white glue to secure one end of the ribbon to the center at the top of the cardboard backing. Glue the other end of the ribbon on top of the first end.
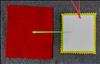 Quickly place a bead of glue around the outer edge of the cardboard on the back of your project and then place face-up on the center of the felt so that the edges are equal on all sides. If you have a large project, you may need to glue one side first and then glue opposing sides a little at a time and move down until you glue the bottom.
 The finished ornament is complete and can be hung using the hanger added to the top.