
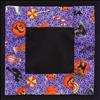
This finishing technique is similar to the Filled Pillow With Optional Braid & Tassel but instead of sewing the finished piece into the ornament, a pocket is created which frames and holds your stitched piece in place.
 Using the pattern piece labeled Pillow Back, Stitching Back, cut two pieces of fabric and two pieces of Fusible Web to the size marked. If you are using a patterned fabric, you can substitute a solid color for the Stitching Back since it will not be seen.
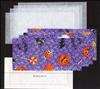 Using the pattern piece labeled Borders, cut four pieces of fabric and four pieces of Fusible Web to the size marked. If you chose the Pillow Shape Same As Pattern option when creating your pattern, you will have two separate pattern pieces, one labeled Top & Bottom Borders and the second labeled Side Borders. Cut two fabric and two Fusible Web pieces for each.
 Using the pattern piece labeled Stitched Project, place the pattern over your stitched piece and align the X in the center of the pattern with the center of your stitched piece. Trim your stitched piece along the line labeled Maximum Size. Your project will fit within the pillow provided it is not smaller than the line labeled Minimum Size. Use pinking shears to cut in a zig-zag pattern along the edges or baste the edges to prevent from unraveling.
 Center the Fusible Web pieces on the BACK of each of the fabric pieces cut in Step 1 and secure according to manufacturer's directions.
 Center the Fusible Web pieces on the BACK of each of the fabric pieces cut in Step 2 and secure according to manufacturer's directions. Fold each strip in half lengthwise with the backs facing inward. The fold line is also marked on the pattern. Iron flat.
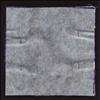
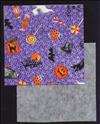
 Take the fabric cut from the Stitching Back pattern and lay flat with the back facing down. Note if you choose the Pillow Shape Same As Pattern option, it is important to position the fabric in same direction as the pattern.
 Stitch the four strips to the back along the dotted seam allowance line indicated on the pattern. This forms the pillow front.
 If you choose to add a hanger to the pillow, cut a piece of ribbon or Braided Cording that is twice as long as the finished height of your pillow. Put the ends together and pin to the top center of the pillow front completed in Step 6.
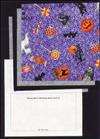
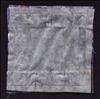 Take the fabric cut from the Pillow Back pattern and pin with the back facing out to the pillow front. Note that it is critical to leave an opening at the bottom of the pillow for stuffing. This location is marked on the Pillow Back pattern with the words Do Not Sew. Mark this location with pins as a reminder. Turn over and stitch along the previous stitching line made when the borders were sewn to the stitching back being sure to leave the opening at the bottom.
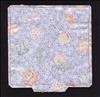 Trim the excess fabric to within 1/8" (32 mm) of the stitched edge excluding the area near the opening at the bottom. Clip the corners at a 45 degree angle to ensure that the finished corner lays properly being careful not to cut into the sewn area.
 Turn the stitched fabric "outside-in" so that the back of the stitching is now on the inside. To do this, take the side of the stitching opposite the opening and push it through the opening. You may need to use a Point Turner to push the corners out completely. Gently lift the borders of the pillow and slide your stitched piece under centering within the opening. Iron flat with the stitching face down.
 Fill the ornament with Fiberfil from the opening left in the bottom. For a flatter ornament, use less filling. To create a fuller ornament, add more.
 After adding the desired amount of filling, Slip-Stitch the opening at the bottom edge together and insert your stitched project.