
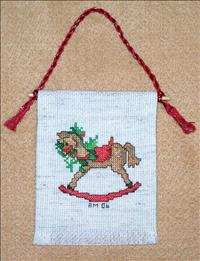
This finishing technique describes how to create a mini banner ornament from your finished project. It is best suited for projects that are under 5" (13cm) wide.
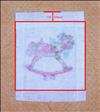
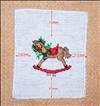 Trim your finished piece so you have a 2" (5 cm) space from the top and bottom of the actual stitching and 1" (2.5 cm) from the right and left sides.
 With your completed stitching turned faced-down, fold the right and left edges over 1/2" (13mm) towards the center and iron flat.
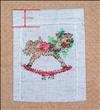 With your completed stitching still turned faced-down, fold the top edge over 1" (2.5cm) towards the center and iron flat.
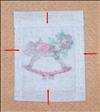
 Place the Fusible Web 1/2" (13mm) down from the top of the stitched piece and secure according to manufacturer's directions.
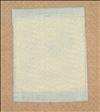
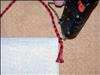
 Run a band of white glue about 1/4" (6mm) wide along the the edge of the Fusible Web. Place the Acrylic Felt cut in Step 4 over the Fusible Web and press the felt down until the glue has set.
To construct the braid for the hanger, select a color of floss that will compliment your stitching. You will need a length of braided cording that is three (3) times the width of your project. For example, if your project is 2" (5cm) wide, you will need 6" (13cm) of braided cording.
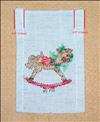
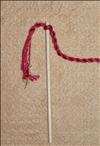
Next, proceed to Step 2 of the Braided Cording finishing instructions. When you reach Step 5, instead of tying opposite the end of the braiding in a knot, tie it around one end of the dowel as shown in the picture. Leave about 1" (2.5cm) of braided cording at the end.
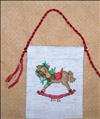 Slide the wooden dowel through the pocket formed in Step 3 at the top of the stitched project. Tie the other end of the braided cording around the end of the wooden dowel without the braid leaving about 1" (2.5cm) of braided cording hanging at the end.
 Put a small dot of hot glue on the knot to secure it to the dowel. If you do not have hot glue, use white glue instead.
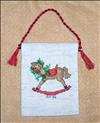 Trim the ends of the braided cording so that they are both equal in length. Unwind the loose ends of the cording to form a tassel on each side. A fine comb can be used to help in straightening the tasseled ends.
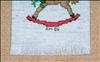 To fray the bottom edge of the ornament, pull out the fabric threads going horizontally along the bottom edge. Stop as soon as you reach the felt.