
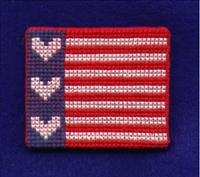
This finishing technique is used to add a magnetic backing to a cross-stitch project turning it into a refrigerator magnet. The fabric is reinforced using a thin piece of solid cardboard.
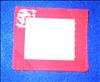 Center the cardboard piece cut in Step 1 on the BACK of your finished stitching. Apply a small amount of white glue to a 1/2" (1.3 cm) square area of one corner. The glue should cover the two edges of the fabric and the corner of the cardboard. Use enough glue to coat the fabric.
 Fold the corner of the fabric over onto the cardboard diagonally forming a triangle. Add additional white glue if the fabric is not completely covered. Press down firmly. Repeat with other three corners.
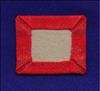 Once all four corners have been glued and folded down, you will have four "tabs", one on each side of the fabric. Apply white glue to one tab and fold down onto the cardboard. Add additional glue to the top of the tab until it is completely covered. Press down firmly. Repeat with other three sides.
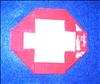
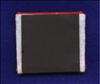 After the felt has dried thoroughly, cut a piece of Magnetic Sheet that is large enough to cover the back of the project. Remove the plastic covering from the adhesive backing. Put a thin bead of hot glue around the edge and in the center of the magnet on the adhesive side. Before the hot glue hardens, press down firmly onto the felt. The hot glue is needed since the adhesive from the magnet usually won't last over time.